Cable tray area fill ratios: 50% max capacity (40% for solid-bottom trays) per TIA cross-sectional area standards. Cable tray systems play a crucial role in modern electrical installations, offering organized and efficient cable management solutions. Proper calculation of the cable tray area is essential for ensuring safety, optimizing space, and maintaining system performance. Miscalculations can lead to overcrowding, overheating, or non-compliance with industry standards. Adhering to the guidelines set by the National Electrical Code (NEC) is critical to achieving safe and compliant installations. These guidelines provide clear parameters for cable types, tray dimensions, and load capacities. For projects requiring flexibility, a folding cable tray can be incorporated to accommodate changing cable needs without compromising space or safety. By understanding how to determine the correct cable tray area, electrical professionals can reduce risks, enhance system reliability, and meet project requirements. Mastering this process is key to effective planning and execution in any electrical setup.
What is Cable Tray Area?
Definition and Importance
The cable tray area refers to the available space within a cable tray that accommodates electrical cables efficiently. It is a critical consideration in electrical installations, ensuring proper cable management, safety, and functionality. The correct calculation of the cable tray area directly impacts the system’s performance by preventing overcrowding, allowing adequate airflow, and avoiding unnecessary strain on cables.
Significance of Cable Tray Area
The proper use of the cable tray area is essential for several reasons:
- Prevents Overheating: Sufficient space between cables allows for better heat dissipation, reducing the risk of overheating and potential system failures. Ventilated cable trays, with their open design, further enhance airflow, helping to keep temperatures under control.
- Enhances Accessibility: A well-calculated cable tray area makes it easier to inspect, maintain, or replace cables during system upgrades or repairs.
- Promotes Longevity: Adequate spacing minimizes the risk of physical damage or insulation wear caused by overcrowding or external pressure.
- Improves Safety: Correctly sized trays ensure cables are securely organized, reducing the risk of accidental damage or electrical hazards.
- Supports Compliance: Adherence to guidelines for the cable tray area ensures installations meet safety and industry standards, such as those outlined in the NEC.
Factors Influencing Cable Tray Area
Cable Types
Different cable types have specific size and insulation requirements. Multiconductor cables often need more space, while single conductor cables require added spacing to reduce heat buildup. Medium voltage cables need even greater separation due to thermal and electrical considerations. Ensuring compliance with cable tray requirements is essential to maintain safety, support system performance, and meet installation standards.
Tray Dimensions
Tray width, depth, and structure determine cable capacity and airflow. Narrow trays are suited for small control cables, while wider ladder trays support large power cables and better cooling. Proper sizing helps avoid overcrowding, supports maintenance, and improves thermal performance in various industrial environments.
Electrical Load Requirements
Higher current loads generate more heat, requiring spacious trays and adequate airflow. Inadequate tray sizing can lead to overheating, insulation failure, and reduced cable life. Considering electrical load ensures proper spacing, safer operation, and compliance with electrical codes for efficient long-term use.
Environmental Conditions
Tray systems must match environmental demands. High-temperature areas need extra spacing for ventilation, while corrosive or wet environments may require specialized materials like GangLong fiberglass. Adapting to environmental factors protects both cables and trays, ensuring durability and system reliability over time.
Future Expansion
Future-proofing the tray system is essential. Reserving 20–30% extra space allows for easy cable additions without major modifications. This forward-thinking approach reduces long-term costs, supports scalability, and ensures flexibility for future upgrades or system changes.
NEC Guidelines for Cable Tray Area
Key Points from NEC Article 392
The National Electrical Code (NEC) Article 392 establishes comprehensive guidelines for the installation and management of cable tray systems. Following these requirements ensures not only code compliance but also promotes operational safety, system longevity, and performance efficiency.
Cable Fill Limits
NEC Article 392 defines the maximum allowable fill area within a cable tray to prevent overheating and mechanical strain. These limits vary depending on the tray type and the cable classification. For instance, ladder trays used for control or signal cables may allow a fill capacity of up to 50%, while solid-bottom trays are typically limited to 40%. These percentages are calculated based on the total cross-sectional area of the cables compared to the available tray space, helping to maintain airflow and minimize thermal buildup.
Separation Requirements
To reduce electrical interference and enhance safety, NEC mandates proper separation between different cable types, particularly between power cables and low-voltage signal or control cables. This can be achieved by physically dividing the tray using barriers or by conceptually zoning the tray space to ensure adequate clearance. These separation practices help prevent electromagnetic interference (EMI), signal degradation, and safety hazards, especially in systems carrying both high and low-voltage circuits.
Tray Width Standards
The NEC provides detailed sizing tables to ensure that cable trays are wide enough to accommodate all installed cables without exceeding the maximum fill rate. Installers must calculate the total cross-sectional area of the cables and match it with the corresponding tray width and depth. This ensures that cables are not crammed or stacked inefficiently, which can compromise ventilation and increase mechanical stress on the cable insulation over time.
Grounding and Bonding
Grounding and bonding are essential for electrical safety and system performance. Metal cable trays must be properly bonded and grounded according to NEC guidelines to prevent the accumulation of stray electrical currents or voltage differentials. This reduces the risk of electric shock, fire, or damage to connected equipment. In many cases, the cable tray itself can serve as an equipment grounding conductor if it meets specific bonding criteria.
Fire Safety
Fire prevention is a critical consideration in cable tray installations, particularly in industrial or hazardous environments. NEC requires the use of flame-retardant materials and, when necessary, additional fireproofing measures. Proper spacing of cables within the tray is also important, as overcrowded trays can accelerate the spread of flames. Selecting fire-rated trays and observing NEC spacing standards can significantly reduce fire risk and improve emergency response readiness.
Importance of NEC Compliance
Complying with NEC guidelines for the cable tray area offers numerous benefits:
- Ensures Safety: Proper installations reduce risks of electrical faults, overheating, and fire hazards.
- Simplifies Inspections: NEC-compliant systems are easier for inspectors to verify, reducing project delays.
- Increases Longevity: Systems designed according to NEC standards experience fewer failures and maintenance issues.
- Supports Legal Requirements: Non-compliance can result in fines or legal challenges for project stakeholders.
- Improves Efficiency: Adhering to NEC recommendations ensures optimal performance for electrical systems.
Why Choose Articulated Cable Tray for Dynamic Environments?
Cable Tray Area Calculation Methods
Cable Tray Area Formula
Basic Formula for Cable Tray Area
The cable tray area is calculated by determining the total cross-sectional area of the cables to be installed and ensuring it fits within the tray’s dimensions while complying with regulatory guidelines. The basic formula involves:
- Measuring the diameter of each cable.
- Calculating the cross-sectional area for individual cables using the formula: A=π×(d2)2A = \pi \times \left(\frac{d}{2}\right)^2A=π×(2d)2 where AAA is the area and ddd is the diameter.
- Summing the areas of all cables to determine the total required cable tray area.
- Ensuring the total area does not exceed the tray’s permissible fill percentage.
Step-by-Step Calculation Example
Scenario:
A cable tray needs to accommodate three cables with diameters of 20 mm, 15 mm, and 10 mm.
Steps:
- Calculate individual cable areas:
- For 20 mm: A=π×(10)2=314.16 mm2A = \pi \times (10)^2 = 314.16 \, \text{mm}^2 A=π×(10)2=314.16mm2
- For 15 mm: A=π×(7.5)2=176.71 mm2A = \pi \times (7.5)^2 = 176.71 \, \text{mm}^2 A=π×(7.5)2=176.71mm2
- For 10 mm: A=π×(5)2=78.54 mm2A = \pi \times (5)^2 = 78.54 \, \text{mm}^2 A=π×(5)2=78.54mm2
- Total area: 314.16+176.71+78.54=569.41 mm2314.16 + 176.71 + 78.54 = 569.41 \, \text{mm}^2 314.16+176.71+78.54=569.41mm2
- Ensure this area is within the cable tray’s allowable capacity. If the tray is rated for a 50% fill limit and has a cross-sectional area of 1500 mm², the calculation is: 1500×0.5=750 mm21500 \times 0.5 = 750 \, \text{mm}^2 1500×0.5=750mm2Since 569.41 mm2≤750 mm2569.41 \, \text{mm}^2 \leq 750 \, \text{mm}^2569.41mm2≤750mm2, the tray can accommodate these cables.
Factors to Consider in the Formula
- Tray dimensions must provide adequate airflow for cooling.
- The material of the tray, such as GangLong Fiberglass, impacts load capacity and heat resistance.
- Regulatory guidelines like NEC must be adhered to when determining permissible fill.
Tools for Calculating Cable Tray Area
| Tool/Method | Description | Pros | Cons |
|---|---|---|---|
| Manual Calculation | Hand calculation using formulas and NEC tables | Simple, no tools needed | Slow, easy to make mistakes |
| Digital Calculators | Software or apps for automatic calculation | Fast, accurate, NEC-compliant | Needs a device, may require learning |
| NEC Tables & Charts | Official NEC data on fill limits and tray sizes | Reliable, easy to reference | Manual use, not interactive |
| Material Charts | Select materials for trays (e.g., GangLong) | Good for harsh environments | Limited options, brand-specific |
| Online Tools | Web calculators for quick tray sizing | Instant results, user-friendly | Internet required, limited customization |
| Design Software | CAD/BIM tools with tray sizing features | Integrated in design, ideal for big projects | Expensive, not needed for small jobs |
| Reference Guides | Printed or PDF sizing and fill limit charts | Easy to access, good for field use | May be outdated, not dynamic |
Standard Cable Tray Sizes and Specifications
Standard Sizes
Overview of Standard Dimensions
The cable tray area is determined by the tray’s dimensions, typically specified in terms of height (H), width (W), and thickness (T). Standard sizes vary to accommodate different cable loads and environmental conditions. These dimensions are usually measured in millimeters and tailored for specific applications.
- Height (H): Common heights range from 50 mm to 600 mm. Taller trays are ideal for installations requiring more cable stacking or insulation.
- Width (W): Widths range from 100 mm to 900 mm, with wider trays suitable for high-capacity systems.
- Thickness (T): Materials like GangLong Fiberglass often have thicknesses from 1.2 mm to 2.0 mm, balancing strength and weight.
Common Configurations
Cable trays are manufactured in various configurations, each optimized for specific uses:
- Lightweight Trays: Typically used for signal cables or small installations.
- Heavy-Duty Trays: Designed to support power cables in industrial environments.
- Ventilated Trays: Allow airflow to reduce heat buildup in densely packed systems.
Factors Influencing Tray Dimensions
Several factors impact the choice of cable tray dimensions:
- Cable Load Requirements: Heavier loads require trays with greater height and thickness.
- Environmental Conditions: Corrosive environments may require reinforced materials, such as GangLong Fiberglass.
- Future Expansion Needs: Larger trays accommodate additional cables, avoiding costly upgrades.
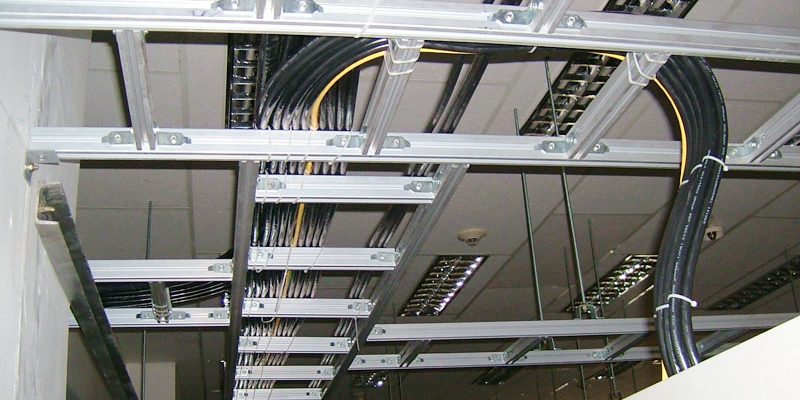
Ladder-Type Cable Trays
Dimensions and Specifications
Ladder-type trays are among the most common configurations for managing the cable tray area. They feature side rails connected by rungs, providing strength and versatility.
- Rung Spacing: Typically spaced at 150 mm to 300 mm, ensuring even cable distribution and support.
- Tray Widths: Standard widths range from 150 mm to 900 mm, catering to various cable capacities.
- Load Capacity: Ladder trays can support heavy cable loads due to their robust structure.
Advantages of Ladder-Type Trays
- Airflow Optimization: The open design minimizes heat accumulation, enhancing cable performance.
- Ease of Installation: Multiple entry and exit points simplify cable routing.
- Durability: Materials like GangLong Fiberglass ensure resistance to corrosion, fire, and high temperatures.
Impact of Rung Spacing on Cable Performance
Rung spacing significantly influences the functionality of the cable tray area:
- Sag Prevention: Closer rung spacing reduces cable sagging, maintaining a clean installation.
- Load Distribution: Evenly spaced rungs distribute weight, minimizing stress on cables.
- Safety Compliance: NEC guidelines recommend specific spacing to meet safety standards.
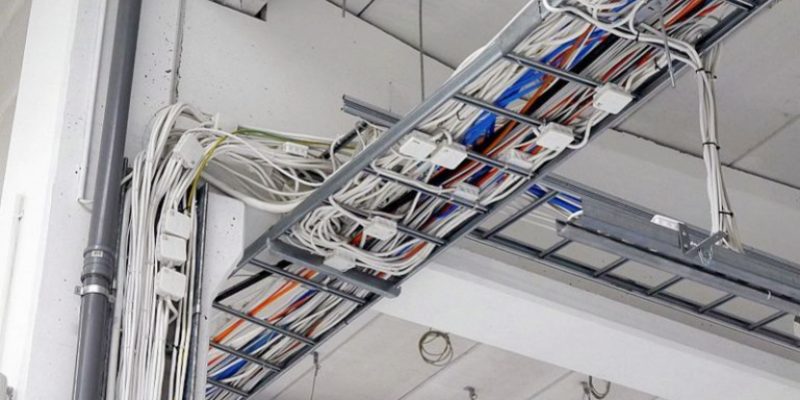
Examples of Ladder Tray Applications
- Industrial Settings: Used for power and control cables in manufacturing plants.
- Commercial Buildings: Ideal for large data centers requiring organized cable management.
- Outdoor Installations: With GangLong Fiberglass, these trays resist harsh weather conditions while maintaining structural integrity.
By understanding standard sizes and the advantages of ladder-type trays, professionals can optimize the cable tray area for safe and efficient installations.
Optimizing Infrastructure with a Communication Cable Tray
Cable Tray Area for Different Cable Types
Multiconductor Cables (2000 Volts or Less)
Calculating Cable Tray Area for Multiconductor Cables
The cable tray area for multiconductor cables depends on the cross-sectional areas of individual cables and the tray’s permissible fill limit. Multiconductor cables are commonly categorized based on their size: smaller than 4/0 and 4/0 or larger.
- Cables Smaller Than 4/0: These cables generally require less tray space but must adhere to the total allowable fill percentage of the tray. For example, NEC guidelines specify that the total cable cross-sectional area cannot exceed 40% of the tray area in solid-bottom trays and 50% in ladder trays.
- Cables 4/0 or Larger: These cables demand more space due to their increased diameter and insulation requirements. A 4/0 cable, for instance, may occupy a significant portion of the tray width, requiring precise calculations to avoid overcrowding.
Example Calculation Using NEC Guidelines
Scenario: A tray must accommodate two 4/0 cables (with a cross-sectional area of 107.2 mm² each) and five smaller cables (each with a cross-sectional area of 28.8 mm²).
- Total cable area:(2×107.2)+(5×28.8)=428.8 mm2(2 \times 107.2) + (5 \times 28.8) = 428.8 \, \text{mm}^2 (2×107.2)+(5×28.8)=428.8mm2
- Tray selection: A ladder tray with a cross-sectional area of 1000 mm² and a 50% fill limit can hold up to 500 mm² of cables. Since 428.8 mm² ≤ 500 mm², this configuration complies with NEC standards.
Considerations for Multiconductor Cables
- Cable Arrangement: Proper spacing avoids overheating and ensures compliance with thermal guidelines.
- Environmental Conditions: Materials like GangLong Fiberglass are ideal for environments with high temperatures or corrosive substances.
- Future Expansion: Selecting a larger tray accommodates potential cable additions without overloading.
Single Conductor Cables (2000 Volts or Less)
Requirements for Single Conductor Cables
Single conductor cables with a voltage rating of 2000 volts or less must be 1/0 or larger. Unlike multiconductor cables, these cables cannot be installed with continuous bottom pans unless specific spacing requirements are met.
Considerations for Tray Width and Cross-Sectional Area
- Tray Width: NEC guidelines recommend single-layer installation to prevent unbalanced voltage and excessive heat accumulation.
- Cross-Sectional Area: The total cross-sectional area must remain within the tray’s permissible limits, even with single-layer arrangements.
Advantages of Single Conductor Cables in Cable Tray Area
- Efficient Heat Dissipation: Single-layer layouts allow better airflow, reducing thermal stress on cables.
- Flexibility in Routing: These cables can be organized more easily, simplifying maintenance and inspection.
- Durability: Materials like GangLong Fiberglass enhance cable protection in harsh environments.
Example Installation
Scenario: A tray must hold three 1/0 cables, each with a cross-sectional area of 85 mm². With a tray rated for 300 mm², the cables occupy 255 mm², leaving enough space for safe operation.
MV and MC Cables (2001 Volts or Over)
Guidelines for Medium Voltage (MV) and Metal-Clad (MC) Cables
Cables rated for 2001 volts or higher require careful consideration of the cable tray area due to their higher voltage and thermal demands.
- Medium Voltage (MV) Cables: These cables must have adequate spacing to prevent arcing and ensure safe operation. NEC guidelines specify maximum tray fill percentages and minimum separation distances.
- Metal-Clad (MC) Cables: The metal cladding offers enhanced protection but increases the cable diameter, requiring additional tray space.
Factors to Consider for MV and MC Cables
- Thermal Management: Adequate airflow is critical for high-voltage cables to prevent overheating.
- Material Selection: GangLong Fiberglass trays resist the heat and stress associated with high-voltage installations.
- Safety Standards: NEC Article 392 outlines strict requirements for tray fill limits and grounding practices.
Example Calculation
Scenario: A tray needs to hold three MV cables, each with a cross-sectional area of 150 mm², in a 50% fill ladder tray rated for 1000 mm².
- Total cable area:3×150=450 mm23 \times 150 = 450 \, \text{mm}^2 3×150=450mm2
- Tray capacity:1000×0.5=500 mm21000 \times 0.5 = 500 \, \text{mm}^2 1000×0.5=500mm2
Since 450 mm² ≤ 500 mm², the configuration complies with NEC guidelines.
By carefully considering the requirements of multiconductor, single conductor, MV, and MC cables, professionals can optimize the cable tray area for safe and efficient installations.
Practical Tips for Cable Tray Area Calculations
Common Mistakes to Avoid
Calculating the cable tray area accurately is crucial for the safety and efficiency of electrical installations. Avoiding common mistakes helps prevent costly repairs and downtime.
Overloading Trays Beyond Permissible Limits
Overloading is one of the most frequent issues. Exceeding the fill percentage allowed by NEC guidelines can lead to:
- Overheating: Insufficient airflow increases cable temperatures, leading to insulation breakdown and reduced cable lifespan.
- Mechanical Strain: Overcrowding can cause physical damage to cables, leading to potential failures.
- Non-Compliance: Installations that exceed permissible limits may fail inspections, resulting in project delays.
Example: An industrial tray designed for a 50% fill limit is overloaded to 70%. This causes overheating, resulting in system failure within months. Correct planning and adherence to guidelines could have avoided the issue.
Misinterpreting NEC Guidelines
Misunderstanding NEC standards often leads to non-compliance and operational risks. Key mistakes include:
- Improper Fill Percentage Calculations: Misapplying fill limits for specific tray types, such as ladder versus solid-bottom trays.
- Inadequate Separation: Failure to maintain proper spacing between high-voltage and low-voltage cables.
- Ignoring Expansion Needs: Not accounting for future cable additions leads to overcrowding as systems grow.
Example: A tray intended for low-voltage cables is used for mixed voltage levels without proper spacing, causing interference and safety concerns.
Optimizing Cable Tray Design
Efficient design of the cable tray area ensures reliable performance and reduces the likelihood of system failures.
Tips for Efficient Cable Layout
A well-planned layout maximizes the tray’s utility while maintaining safety and performance. Consider the following:
- Cable Grouping: Organize cables by type and function, separating power, control, and data cables to avoid interference.
- Spacing: Leave enough room for airflow and cooling to prevent overheating.
- Layering: Arrange cables in layers for easier identification and future adjustments.
Example: In a data center, separating data and power cables in distinct zones minimizes interference and improves system reliability.
Minimizing Cable Sag
Sagging cables can strain connections and compromise system safety. To address this:
- Install Closely Spaced Rungs: Rungs spaced 150-300 mm apart support cables effectively and reduce sagging.
- Use Trays with High Load Capacity: Materials like GangLong Fiberglass provide strength and resistance to mechanical stress.
Example: An installation with 300 mm rung spacing maintains cable integrity and avoids sagging over a 10-meter span.
Supporting Larger Cable Bunches
Larger cables or cable bundles require additional support to ensure stability and safety:
- Use Dividers: Divide the tray into zones to organize and distribute cable loads.
- Secure Bundles: Use ties or clamps to prevent movement during operation.
- Upgrade Material Strength: For heavier loads, select robust materials such as GangLong Fiberglass trays.
Example: In an industrial facility, dividing a tray into three zones ensures balanced load distribution and simplifies cable management.
By avoiding common mistakes and optimizing tray design, professionals can effectively calculate and utilize the cable tray area for safe, efficient, and compliant installations.
How Accurate Cable Tray Measurement Ensures System Efficiency
Helpful Resources for Cable Tray Area Calculations
Cable Tray Area Charts and Tables
Overview of NEC Tables and Standardized Sizing Charts
NEC tables and standardized sizing charts are essential tools for determining the appropriate cable tray area. These resources provide pre-calculated values and dimensions to simplify the decision-making process.
Key Information Found in Charts and Tables:
- Permissible Fill Percentages: Indicate the maximum allowable cable volume based on tray type and application.
- Standardized Tray Sizes: Cable tray list dimensions like width, height, and thickness for various tray configurations.
- Cable Cross-Sectional Areas: Offer pre-calculated areas for different cable types and voltage ratings.
How to Use These Resources Effectively
- Identify Your Requirements: Determine the cable types, dimensions, and total cross-sectional area needed for your installation.
- Consult Relevant Tables: Match your calculations with NEC guidelines to ensure compliance.
- Cross-Check: Verify that the selected tray’s capacity supports future expansion needs.
Example Use Case:
A technician calculates the total cross-sectional area of cables and uses NEC Table 392.22(A) to confirm the tray selection. This ensures that the installation meets safety standards without exceeding fill limits.
Cable Tray Sizing Calculators
Introduction to Available Tools for Precise Calculations
Cable tray sizing calculators streamline the process of determining the appropriate cable tray area by automating complex calculations. These tools allow users to input variables like cable dimensions, tray types, and environmental conditions to generate precise recommendations.
Features of Sizing Calculators:
- Built-In NEC Compliance: Automatically apply NEC guidelines to ensure safe and compliant designs.
- Customizable Inputs: Adapt calculations to specific project requirements, such as load capacity and cable type.
- Real-Time Adjustments: Instantly update results when variables are modified, saving time during the planning phase.
Benefits of Using Software Tools Over Manual Methods
- Increased Accuracy: Minimize errors associated with manual calculations.
- Time Savings: Automate repetitive tasks, allowing focus on other aspects of project design.
- Simplified Compliance: Built-in NEC standards reduce the risk of non-compliance.
Example:
A project manager uses a digital calculator to evaluate multiple tray options. By testing different configurations, the team identifies the most efficient solution, reducing costs and ensuring safety.

Essential Considerations for Selecting the Right Cable Tray System
In modern electrical system design, careful planning and selection of the cable tray area is critical. The right cable tray system ensures organized cable management, long-term reliability, and efficient installation. It also plays a key role in supporting system scalability, device integration, and cross-system compatibility. Whether in industrial facilities, commercial buildings, or smart infrastructure projects, designing an effective cable tray area involves evaluating environmental conditions, mounting flexibility, cable types, and load capacities. A well-designed cable tray area lays the foundation for a safe, efficient, and future-ready electrical installation.
Environmental Suitability
Choose tray materials based on environmental exposure. Outdoor or corrosive areas may require hot-dip galvanized, stainless steel, or fiberglass trays for corrosion resistance. Indoors, powder-coated trays offer both protection and aesthetics. Always assess factors like humidity, salt air, extreme temperatures, and seismic activity to select a finish that ensures long-term durability and performance.
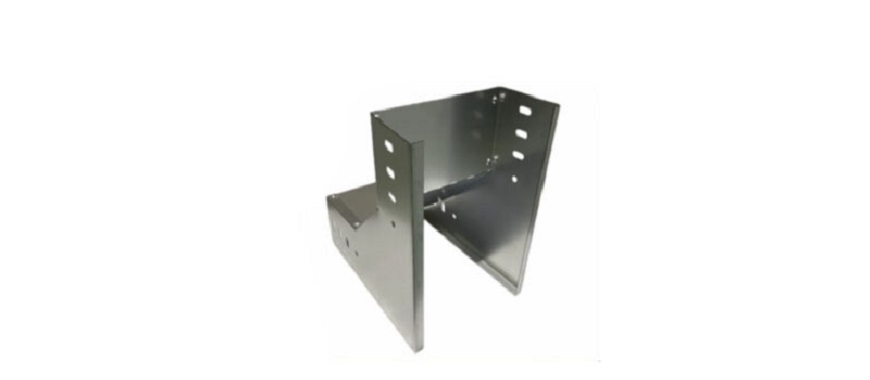
Mounting and Installation Flexibility
Cable trays must support various mounting methods: ceiling-suspended, wall-mounted, floor-based, or rack-attached. Trays with universal mounting holes or built-in brackets save time and reduce hardware needs. Quick-connect features or prefabricated components simplify transitions and elevation changes. Flexible tray designs enhance adaptability to complex site layouts and lower installation labor costs.
Cable Type and Compatibility
Make sure your tray is compatible with NEC-approved cable types like TC, MC, MI, ITC, fiber optics, and fire alarm cables. Tray structure should match cable size, bend radius, and insulation requirements. For mixed-use installations, use dividers to separate power and signal cables to avoid interference and comply with regulatory standards.
Load Capacity and Fill Ratio
Follow NEC Article 392 guidelines on fill limits, which vary by tray type and cable voltage. Overfilled trays can cause overheating and damage. For long-term performance, initial fill should be around 40–50% to leave room for airflow and future cable additions. Consider cable weight, ampacity, and mechanical stress during selection.
Future-Proofing and Scalability
Cable volume is rising with smart buildings, AI, and renewable systems. Select trays with room for future expansion. Oversized or modular trays can help avoid costly replacements later. Many professionals size trays based on current needs plus 10–20% extra capacity to ensure the system remains flexible as infrastructure evolves.
Grounding and Electrical Bonding
In medium or high-voltage systems, trays may serve as grounding conductors. Bonding jumpers, clamps, and splice plates must be used to maintain electrical continuity. Both side rails must be bonded according to NEC standards. Proper grounding reduces electromagnetic interference, increases safety, and protects systems during faults.
Integration with Devices and Accessories
Modern installations often require trays to support devices such as cameras, lighting, sensors, or access points. Choose trays that allow for clean cable exits and accessory mounting without extra fabrication. Built-in slots, pre-drilled holes, and universal attachment points make integration easier and reduce on-site customization work.
Material Handling and Logistics
Efficient material handling is vital for project timelines. Use stackable or nestable tray designs to minimize shipping space and job site storage. Fewer deliveries reduce carbon emissions and freight costs. Centralized storage improves inventory control, simplifies staging, and helps installers access what they need quickly on-site.
On-Site Modification Requirements
Minimizing fabrication on-site saves time and labor. Instead of cutting and welding straight tray sections, use factory-made elbows, tees, and risers. Preformed parts ensure consistency, improve safety, and speed up installation. This is especially valuable in tight schedules or when working in complex facility layouts.
Cross-System Compatibility
Avoid cable tray systems that only work with their own branded accessories. Choose open and non-proprietary systems to allow easy integration with other electrical or mechanical systems. Cross-compatible trays provide flexibility in procurement, simplify project changes, and reduce dependency on a single vendor or product line.
Ensuring Efficiency and Safety in Cable Tray Area Calculations
Recap of Importance
Accurate calculation of the cable tray area is vital for ensuring the safety, efficiency, and longevity of electrical installations. Overcrowding cables can lead to overheating, while underutilizing trays may waste resources.
Encouragement to Follow NEC Guidelines
Adherence to NEC guidelines ensures compliance, reduces risks, and simplifies inspection processes. These guidelines provide a reliable framework for calculating tray dimensions and cable capacity. Using tools like a cable tray calculator can greatly streamline this process, helping to accurately determine the proper dimensions and ensure alignment with NEC standards. This tool aids in ensuring that all calculations are precise, reducing the likelihood of errors and ensuring compliance with safety regulations.
Call to Action
Professionals are encouraged to invest time in understanding proper cable tray sizing techniques. Leveraging resources like GangLong Fiberglass trays and NEC-compliant tools is essential for safe and efficient installations. Prioritize planning, follow regulatory standards, and embrace innovative tools to optimize every cable tray area calculation. This approach leads to better outcomes, both in terms of safety and performance.
FAQs about Cable Tray Area
Standard cable tray sizes vary based on width, height, and thickness. Common widths range from 100 mm to 900 mm, with heights between 50 mm and 600 mm. Thicknesses are typically 1.2 mm to 2.0 mm, depending on the tray’s material and application. For example, heavier cables may require thicker and wider trays for better support. Materials like GangLong Fiberglass provide durability in corrosive environments. Always select a tray size that accommodates the cables while leaving room for airflow and potential future expansion.
Cable spacing in trays is crucial for preventing sagging and ensuring proper airflow. Ladder trays typically feature rung spacing between 150 mm and 300 mm. Closer spacing reduces sagging and supports smaller cables more effectively. For high-voltage cables, ensure adequate separation to prevent arcing and interference. NEC guidelines also specify minimum distances between different cable types within the tray. Proper spacing enhances safety, extends cable life, and maintains system performance.
The NEC code for cable trays is outlined in Article 392. It provides comprehensive guidelines on tray selection, cable types, and installation requirements. Key points include allowable fill percentages, grounding requirements, and spacing rules. For example, Article 392.22 specifies the maximum cable fill based on tray type, ensuring safety and compliance. Grounding and bonding requirements help prevent electrical hazards, while fire safety measures are mandated for certain installations. Understanding NEC standards is essential for ensuring that cable tray systems meet legal and safety regulations.

As the editor of GangLong Fiberglass, I have years of experience and in-depth research, focusing on cable tray products, fiberglass solutions, and grille systems. I incorporate years of industry insights and practical experience into every content, committed to promoting the progress of the industry. At GangLong Fiberglass, my commitment is reflected in every product, from innovative cable trays to durable fiberglass solutions and sturdy grille systems. As an authoritative voice in the industry, my goal is to provide valuable information to professionals and businesses and promote forward-looking solutions.