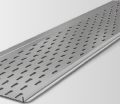
A cable tray joint plate is an essential component used in cable management systems. In cable tray use, it serves as the connection between two sections of cable trays, ensuring the structural integrity of the tray system. The cable tray joint plate helps secure the trays in place, providing a stable foundation for routing and organizing electrical cables. Without a properly installed joint plate, cables could become exposed or disorganized, leading to safety hazards or inefficiency. These plates are crucial for maintaining the functionality of cable tray systems in a variety of settings, from industrial plants to commercial buildings. Their role extends beyond just physical connection—they ensure that cables are safely supported, aligned, and secured, minimizing potential damage.
Cable Tray Joint Plate Sizes
Standard Sizes Available
Cable tray joint plates come in several standard sizes, which are carefully designed to ensure compatibility with the most commonly used cable tray systems in the industry. These sizes help streamline the installation process and ensure that components fit together securely. The most common sizes for joint plates include:
- 300mm: This is a popular size, ideal for standard cable trays with a smaller width, typically used in light-duty applications or residential/commercial installations where cable volumes are moderate.
- 600mm: A more common choice for medium to large-scale cable tray installations, this size is often used in industrial and commercial settings where heavier or more cables are managed.
- Other sizes: Depending on the manufacturer or specific system requirements, joint plates may also come in a range of sizes to accommodate specific tray widths, such as 150mm, 450mm, or larger custom dimensions. These additional sizes cater to unique tray systems or specialized applications.
These standard dimensions ensure that joint plates are versatile and fit seamlessly with most off-the-shelf cable tray systems. They allow for ease of integration and offer flexibility in applications from light-duty to heavy-duty cable management.
How to Choose the Right Size
Selecting the appropriate cable tray joint plate size requires a clear understanding of the specific installation needs. Key considerations include:
- Tray Width and Length: The width and length of the tray sections being connected will directly influence the plate size you need. Joint plates must match the tray’s dimensions to ensure a secure, stable connection. If you are working with an unusual tray width, you may need to consider custom solutions.
- Cable Load and Weight: Cable Load and Weight: The amount of cable being supported plays a critical role in determining the size and strength of the joint plate. In cable tray load calculation, for heavier or denser cable runs, it’s important to select a larger joint plate or a thicker, more robust design that can handle the additional load without buckling or bending.
- System Type and Design: If the cable tray is part of a system that includes additional features such as vertical runs, turns, or tees, the joint plate will need to support these configurations. Certain plate sizes are designed to work with specialized tray setups, such as corner plates or junction plates that accommodate angle joints.
- Structural Integrity and Safety: It’s essential to ensure that the joint plate provides enough surface area for proper fastening to keep the trays securely in place. If the tray system is subjected to vibrations or high levels of activity, choosing a larger plate with more fastening points may be advisable to increase system stability and safety.
Choosing the right size joint plate is crucial to ensuring the long-term performance of the cable tray system. A well-fitted joint plate will not only enhance the structural integrity of the tray but also make installation faster and safer. During cable tray expansion joint installation, selecting the appropriate joint plate is essential for allowing controlled movement in response to temperature changes, reducing stress on the tray system while maintaining a secure and stable structure.
Customization Options
While standard sizes work for many typical applications, there are times when custom joint plates are required to meet unique installation needs. In these cases, customization offers several advantages:
- Non-Standard Tray Dimensions: For projects with custom or irregularly sized trays, standard joint plates may not provide a good fit. Custom plates can be designed to match specific tray widths, ensuring that each tray section connects securely. This is especially important when dealing with special configurations or trays manufactured to unique dimensions.
- Heavy-Duty and Specialized Applications: Some installations, particularly in industrial or high-capacity environments, may require joint plates capable of handling significant weight and stress. Custom joint plates can be reinforced with stronger materials or designed to distribute weight more evenly, preventing failure under heavy loads. For example, in data centers, power plants, or high-rise buildings, where cable trays are subject to large volumes of cables and heavier equipment, custom plates are essential for maintaining system stability.
- Tray Configurations with Complex Angles: In certain projects, tray systems may require angled trays, curves, or intersections. Standard plates may not provide adequate support for these configurations. Custom joint plates can be designed to accommodate specific angles or geometry, providing more secure connections and ensuring the integrity of the tray system.
- Corrosion Resistance: Some environments—such as outdoor or coastal installations—require joint plates that are resistant to corrosion or other environmental factors. Custom joint plates can be made from stainless steel, galvanized steel, or other corrosion-resistant materials to ensure a longer lifespan in harsh conditions.
- Size Adjustments for Increased Load Capacity: In some cases, projects demand that joint plates be adjusted to support extra weight. This could mean increasing the thickness or size of the plate to ensure it meets load-bearing requirements. Custom solutions offer the flexibility to accommodate such needs, providing a more secure and reliable connection than off-the-shelf plates.
Custom joint plates are generally available through manufacturers that specialize in tailored cable tray solutions. The customization process involves detailed measurements, load considerations, and material selection to ensure the plate meets the specific needs of the project. By opting for custom joint plates, you can ensure that your cable tray system is perfectly suited to your installation environment, whether it’s a large-scale industrial setup or a unique commercial application.
Understanding Cable Tray Structure and Its Key Components
Cable Tray Joint Plate at Cbrofiberglass
Availability and Options
Cbrofiberglass offers a wide selection of cable tray joint plates, designed to meet the needs of both residential and commercial cable tray systems. These joint plates come in various sizes, materials, and finishes, making it easier for customers to find the ideal option for their specific installation requirements. The available sizes typically align with standard tray dimensions, ensuring compatibility with common tray systems.
The materials offered include:
- Steel: Known for its strength and affordability, steel joint plates provide excellent structural integrity for most tray systems.
- Galvanized Steel: This material offers corrosion resistance, making it suitable for environments with high humidity or exposure to moisture.
- Aluminum: Lightweight and resistant to rust, aluminum joint plates are often used in applications where both strength and weight considerations are important.
Each material offers its own set of advantages, allowing customers to choose based on their specific needs, such as durability, environmental exposure, or weight requirements.
Features to Look For
When selecting a cable tray joint plate from Cbrofiberglass, there are several key features to consider:
- Corrosion Resistance: For installations in harsh or outdoor environments, it’s crucial to choose plates with galvanized finishes or those made from stainless steel. These materials are designed to withstand corrosion from moisture, chemicals, or environmental exposure, ensuring longevity and performance.
- Material Strength: The strength of the joint plate is essential for ensuring that it can support the weight of the cables without bending or warping. Steel and aluminum offer varying degrees of strength, with galvanized steel providing added resilience in tougher conditions.
- Ease of Installation: Look for joint plates designed with user-friendly installation in mind. Features such as pre-drilled holes for easy fastening or compatibility with your cable tray system can significantly speed up the installation process.
- Compatibility: It’s important to ensure the joint plates are compatible with your specific cable tray system. This includes matching the tray’s width, length, and design features (such as bends or turns) to ensure the plates fit seamlessly and securely.
By considering these factors, you can select a joint plate that offers the right balance of durability, functionality, and ease of installation for your project.
Pricing and Quality Comparison
Cbrofiberglass offers affordable pricing on its cable tray joint plates, with a range of options available to suit various budgets. Prices generally vary depending on the material, size, and any additional features such as corrosion-resistant coatings or reinforcement for heavy-duty applications.
While Cbrofiberglass provides competitive pricing, it’s always a good idea to compare options with other suppliers to ensure you’re getting the best value for your money. Consider the following when comparing pricing and quality:
- Material Choice: Higher-end materials like stainless steel or galvanized steel may come at a premium, but they offer better protection against corrosion and longer-lasting performance, especially in industrial or outdoor settings.
- Warranties and Longevity: Higher-quality joint plates often come with longer warranties and assurances of durability, making them a better investment for long-term installations. These plates may also come with additional features, such as reinforcement or greater load-bearing capacity, which can justify the higher price.
- Cost vs. Performance: While the upfront cost is important, also factor in the long-term performance and potential maintenance costs of lower-quality plates. Sometimes opting for a slightly higher-priced plate with better durability and performance can save money in the long run.
By weighing the cost against the expected lifespan and performance of the joint plates, you can ensure you’re making a smart, cost-effective choice for your cable tray system.
Table Cable Tray: Tidy Up Cords and Wires
Cable Tray Joint Plate Replacement
Signs of Wear and Tear
Over time, cable tray joint plates can undergo wear and tear due to environmental exposure, heavy usage, or material fatigue. Recognizing the early signs of damage is essential to avoid more significant issues that could compromise the integrity of the cable tray system. Common indicators that a joint plate needs replacing include:
- Visible Rust or Corrosion: Rust is a clear sign that the plate’s protective coating has worn off or that the material itself is deteriorating. If left unchecked, rust can weaken the plate, making it less effective in supporting the cable tray system.
- Warping or Bending: Exposure to extreme temperatures or heavy loads may cause the plate to warp or bend. A warped joint plate may no longer provide proper alignment or secure connection between tray sections, risking instability in the system.
- Cracks or Fractures: Over time, mechanical stress or environmental factors (such as constant vibration) may lead to cracks or fractures in the plate. A cracked plate can compromise the overall structural strength of the tray system and may lead to further damage if not replaced promptly.
- Looseness or Instability: If the joint plate becomes loose or starts to detach from the tray sections, it’s a clear indication that it is no longer serving its purpose effectively. Loose plates can cause instability in the tray system and could lead to misalignment or even cable damage.
If any of these signs are present, it’s critical to replace the joint plate immediately to maintain the structural integrity and safety of the cable tray system.
Step-by-Step Replacement Process
Replacing a cable tray joint plate is a relatively simple task that can be done with basic tools. Here’s a step-by-step guide to help you replace the damaged plate:
- Prepare the Area
Before you begin, make sure the area around the cable tray is clear of obstructions. Turn off any power or signals if the tray is part of an active electrical system. - Remove Fasteners
Using the appropriate tool (typically a screwdriver or wrench), loosen and remove the screws, bolts, or fasteners holding the old joint plate in place. Take care not to damage the surrounding tray or wiring during this step. - Detach the Old Plate
Once all fasteners are removed, carefully detach the old joint plate from the tray sections. Check the area for any additional damage or wear, and clean it if necessary before proceeding with the installation of the new plate. - Inspect the Tray Sections
Before installing the new plate, inspect the tray sections to ensure they are in good condition. Look for any signs of rust, corrosion, or structural damage that could affect the new plate’s performance. - Align the New Plate
Place the new cable tray joint plate in position. Make sure it aligns with the cable tray’s edges and that it fits snugly between the tray sections. Ensure that any pre-drilled holes on the plate match the holes in the tray for easy installation. - Secure the Plate
Using the appropriate fasteners (screws, bolts, etc.), secure the new plate in place. Tighten the fasteners firmly to ensure the plate doesn’t shift, but avoid over-tightening, as this could damage the plate or tray. - Check Stability
After securing the plate, check for stability. The plate should be firmly attached to both tray sections with no noticeable movement. If any loose spots are found, re-tighten the fasteners. - Final Inspection
Conduct a final inspection of the system to ensure the joint plate is securely in place and that the tray system is stable. Recheck for any damage or signs of stress around the plate.
Choosing a Replacement
When selecting a replacement cable tray joint plate, consider the following factors to ensure you choose the right part for your system:
- Dimensions: Ensure the new joint plate matches the width and length of your existing tray system. If you’re unsure about the dimensions, it’s essential to measure the tray sections where the plate will be installed. The replacement plate should fit snugly to ensure proper support.
- Material: Consider the material of the old plate when selecting a replacement. If the original plate was made from galvanized steel, stainless steel, or aluminum, you should aim for a replacement with the same material to maintain compatibility with environmental conditions (e.g., corrosion resistance or strength).
- Tray Compatibility: Make sure the replacement plate is compatible with your tray system. Some systems may have unique configurations or sizes, and the replacement plate should match the specific requirements for secure installation.
- Load and Environment: Consider the weight of the cables and the environment in which the tray system is installed. If the previous plate was exposed to heavy loads or harsh conditions (e.g., outdoors, high humidity), select a high-durability plate made of corrosion-resistant materials like galvanized steel or stainless steel.
- Professional Advice: If you’re unsure about the correct replacement plate, consult a professional or contact the supplier where the original plates were purchased. They can guide you in selecting the best replacement based on the specifications of your existing system.
By ensuring that the replacement plate matches the exact requirements of cable tray system, you can maintain the stability, safety, and efficiency of the installation.
Cable Tray Joint Plate Installation
Signs of Wear and Tear
Over time, cable tray joint plates can experience wear and tear due to a variety of factors such as environmental exposure, heavy usage, or material fatigue. Early detection of damage is crucial to preventing further issues that could compromise the integrity of the cable tray system. Below are some common signs that indicate a joint plate may need to be replaced:
- Visible Rust or Corrosion: Rust often indicates that the plate’s protective coating has worn off or the material itself is deteriorating. Rust weakens the joint plate, reducing its effectiveness in securing the cable tray system. Left unaddressed, rust can spread and cause further damage to the plate and surrounding components.
- Warping or Bending: Extreme temperatures, heavy loads, or physical impacts can cause the plate to warp or bend. A warped joint plate may not align properly with the cable tray sections, leading to potential instability in the system. If left unchecked, it can result in misalignment or detachment of the tray sections.
- Cracks or Fractures: Over time, constant vibrations, mechanical stress, or changes in temperature may cause cracks or fractures to form in the plate. A cracked plate compromises the structural integrity of the system, potentially leading to failures that could affect the safety and efficiency of the cable tray.
- Looseness or Instability: If a joint plate becomes loose or starts to detach from the cable tray, it’s a sign that it is no longer performing its intended function. Loose plates can cause instability in the system, leading to misalignment of tray sections and potential damage to the cables inside.
Step-by-Step Replacement Process
Replacing a cable tray joint plate is a relatively straightforward process that can be done with basic tools. Here’s a clear step-by-step guide to replacing a damaged plate:
- Prepare the Area
Begin by clearing the area around the cable tray. If the tray is part of an electrical system, ensure that the power is turned off to prevent any safety hazards during the replacement process. - Remove Fasteners
Use a screwdriver or wrench to loosen and remove the screws, bolts, or fasteners holding the old joint plate in place. Be cautious not to damage the tray sections or the wiring while removing the fasteners. - Detach the Old Plate
Once all the fasteners are removed, carefully detach the old joint plate from the cable tray sections. Examine the area around the plate for any additional damage, such as rust or corrosion, and clean the surface if necessary before proceeding with the new installation. - Inspect the Tray Sections
Before installing the new plate, inspect the tray sections for any signs of damage. Check for rust, corrosion, or any structural weaknesses that could affect the performance of the new joint plate. - Align the New Plate
Take the new cable tray joint plate and align it with the tray sections. Ensure the plate fits snugly between the tray edges. Make sure that any pre-drilled holes in the plate line up with the holes on the tray for easy installation. - Secure the Plate
Using the appropriate fasteners (e.g., screws or bolts), secure the new plate in place. Tighten the fasteners firmly, ensuring that the plate is securely fastened to the tray sections. However, avoid over-tightening the fasteners, as this could damage the plate or the tray. - Check Stability
Once the plate is secured, check the stability of the installation. Ensure that the joint plate is firmly attached to the tray and does not move or shift when pressure is applied. If any loose spots are found, tighten the fasteners further. - Final Inspection
Perform a final inspection of the cable tray system to ensure the new joint plate is securely in place and that the system is stable. Look for any signs of stress or damage around the joint plate area, and verify that all components are properly aligned.
Choosing a Replacement
When selecting a replacement cable tray joint plate, consider the following factors to ensure you choose the correct part for your system:
- Dimensions: The new joint plate should match the dimensions of your existing tray system. Measure the width, length, and thickness of the tray sections to ensure compatibility. The replacement plate should fit securely between the tray sections to provide proper support and alignment.
- Material: If the original plate was made from galvanized steel, stainless steel, or aluminum, you should choose a replacement made from the same material. This ensures that the replacement plate will maintain the same corrosion resistance, strength, and durability. If the plate was exposed to harsh environmental conditions, consider selecting a high-durability material to prevent future issues.
- Tray Compatibility: Ensure that the replacement plate is compatible with your specific cable tray system. Some systems may have unique configurations or tray designs that require a special type of joint plate. Double-check that the plate fits the tray system’s dimensions and design features.
- Load and Environment: Consider the weight of the cables and the environmental conditions where the tray system is located. If the system is subjected to heavy loads or exposed to corrosive environments (such as outdoor or industrial settings), select a reinforced or corrosion-resistant joint plate made from galvanized steel or stainless steel to ensure long-term performance.
- Professional Advice: If you’re unsure about the right replacement plate, consult a professional or the supplier where you originally purchased the plates. They can guide you in selecting the correct replacement based on your system’s specifications and requirements.
By carefully considering these factors, you can select the appropriate replacement joint plate to ensure the continued stability, safety, and efficiency of your cable tray system.
Cable Tray Step Over Kits for Easy Assembly
Cable Tray Joint Plate Bolts: Essential Components for Secure Cable Tray Installations
When installing cable trays, ensuring that the trays are securely connected is essential for the overall integrity and safety of the wiring system. Cable tray joint plate bolts are key components that play a crucial role in this process. These bolts are used to attach joint plates to the ends of cable trays, helping to securely connect multiple sections of the tray. Here’s why cable tray joint plate bolts are so important:
- Stability and Security: The primary purpose of cable tray joint plate bolts is to provide stability and prevent movement between tray sections. A properly fastened joint ensures that the tray remains firmly in place, reducing the risk of sagging or disconnection.
- Ease of Installation: Using cable tray joint plate bolts allows for easier installation and adjustments of the cable tray system. They provide a simple method of securing tray sections without the need for complex or specialized tools.
- Durability: Cable tray joint plate bolts are made from strong, corrosion-resistant materials, making them durable and long-lasting. This ensures that they can withstand environmental factors like moisture or temperature fluctuations, ensuring the tray system remains functional and safe for years.
- Flexibility: These bolts also offer flexibility during installation. As cable tray systems often need to be adjusted or expanded, cable tray joint plate bolts allow for easy modification of the setup without compromising the system’s integrity.
- Compliance with Industry Standards: Proper use of cable tray joint plate bolts is crucial for meeting industry standards and ensuring the cable tray system adheres to safety regulations, preventing potential hazards like cable strain or tray dislodging.
FAQs about Cable Tray Joint Plate
Yes, cable trays need to be bonded for several important reasons. Bonding is essential to ensure the safety of electrical systems, as it helps prevent electrical shock hazards and provides a path for fault currents to flow safely to the ground. Bonding ensures that all parts of the cable tray system are electrically connected, which is particularly important for preventing accidental contact with live wires and ensuring proper grounding. The bonding process typically involves connecting the cable tray to a ground wire or using conductive bonding materials to link sections of the tray together. By grounding the cable tray, the risk of electric shock is minimized, and the tray’s structural integrity is improved, reducing the potential for electrical fires or other hazards. It is important to follow local codes and regulations regarding bonding practices, as they may vary depending on the installation type and location. Always consult with a qualified electrician to ensure that the cable tray bonding is done correctly and in compliance with the necessary safety standards.
A fish plate is a flat metal plate used in cable tray systems to connect or reinforce two sections of the tray. It is typically installed at the joint or splice between two cable tray lengths to ensure a secure, stable connection. Fish plates are usually made of galvanized steel or stainless steel to provide corrosion resistance and durability in harsh environments. They play a crucial role in maintaining the structural integrity of the cable tray system, ensuring that the trays stay aligned and the cables within them are securely routed. When installing a fish plate, it is important to use the appropriate fasteners to prevent movement between the connected sections and maintain a strong, continuous pathway for the cables. Fish plates are available in various sizes to accommodate different tray widths, and they are often used in both straight runs and angled connections. Proper installation of the fish plate is critical for the safety and efficiency of the cable management system, preventing misalignment or instability that could lead to cable damage.
Installing cable tray rollers is an essential step for ensuring smooth cable management in installations where trays need to be moved or adjusted. Cable tray rollers are used to support and guide the cable trays as they are installed along walls, ceilings, or other surfaces. The process for installing cable tray rollers typically begins with determining the appropriate location for the rollers based on the layout of the cable tray system. It’s essential to ensure that the rollers are spaced evenly and aligned properly to prevent undue stress on the trays or cables. First, secure the roller brackets to the mounting surface using the appropriate hardware, making sure they are level and aligned. Then, attach the rollers to the brackets, ensuring they are able to move freely. For added stability, you may need to lock the rollers in place once the tray is positioned correctly. After installation, carefully check that the tray moves smoothly along the rollers without any obstructions, ensuring an efficient cable installation. Proper installation of cable tray rollers helps maintain the integrity of the cable tray system and prevents strain on cables by providing smooth, controlled movement.
There are five basic cable tray fittings that are commonly used to help route and support cables in a cable tray system. These fittings allow for the creation of turns, angles, or transitions in the cable tray layout, accommodating different routing needs and spatial constraints. The five basic fittings are:
Elbows (Bends) – Used to change the direction of the cable tray, allowing for turns at angles such as 90°, 45°, or other custom angles.
Tees – Tee fittings allow you to create a branching path from a main cable tray, useful for splitting the cable routing in different directions.
Crosses – Similar to tees, crosses allow for multiple branches from a central cable tray, enabling complex routing of cables.
Reducers – Reducers are used to transition between different tray sizes, such as from a wider tray to a narrower tray, ensuring the system remains efficient and organized.
Splice Plates (Joint Plates) – Used to connect two sections of cable tray together securely, ensuring structural integrity and continuous cable routing across the tray system.
Each of these fittings plays a critical role in the flexibility and effectiveness of a cable tray system, allowing it to adapt to various layout requirements while maintaining proper cable support and protection. Proper selection and installation of these fittings are essential for optimizing the performance and safety of the cable management system.

As the editor of GangLong Fiberglass, I have years of experience and in-depth research, focusing on cable tray products, fiberglass solutions, and grille systems. I incorporate years of industry insights and practical experience into every content, committed to promoting the progress of the industry. At GangLong Fiberglass, my commitment is reflected in every product, from innovative cable trays to durable fiberglass solutions and sturdy grille systems. As an authoritative voice in the industry, my goal is to provide valuable information to professionals and businesses and promote forward-looking solutions.