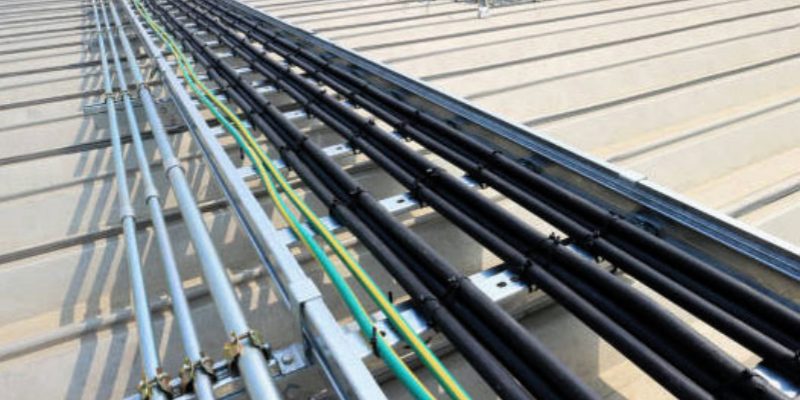
Rooftop cable tray supports various cable runs with self-splicing covers, eliminating splice needs for easy rooftop protection. Rooftop cable trays are an essential component for organizing and managing electrical cables in commercial and industrial buildings with rooftop installations. These systems allow for safe, efficient, and organized cable routing, reducing the risk of damage, overheating, and other potential hazards. By using rooftop cable trays, building managers ensure that wiring is properly maintained, easily accessible for future adjustments, and protected from environmental elements. This article explores the key aspects of rooftop cable trays, including tray sizes, support systems, and equipment supports. We will also delve into how these systems are integrated into rooftop environments, ensuring compliance with the necessary regulations for safety and performance.
Rooftop Cable Tray Sizes: Choosing the Right Dimensions for Your Installation
When planning a rooftop cable tray system, understanding the proper cable tray sizes is crucial for ensuring the system operates efficiently, safely, and within industry standards. Cable trays used on rooftops are available in a variety of dimensions—including heights, widths, and lengths—to accommodate the specific needs of your project, the type of cables being routed, and the expected load. Common cable tray widths include 6″, 12″, 18″, and 24″, though custom sizes can also be manufactured for more specialized installations. The selection of an appropriate size for the cable tray ensures optimal cable organization and management, which plays a significant role in the overall cable tray use and performance. Choosing the right size also contributes to a safer, more efficient installation process.
Factors to Consider When Choosing Cable Tray Sizes for Rooftops
When planning for rooftop cable tray installations, selecting the appropriate size is crucial for maintaining the system’s efficiency, longevity, and safety. Several factors should be taken into account, including cable capacity, future expansion needs, compliance with industry standards, and overall cost-effectiveness. Each of these aspects plays a significant role in ensuring the proper functioning of the cable tray system while preventing potential risks like overheating, damage to cables, or system failure.
Cable Capacity and Tray Size
The size of the rooftop cable tray depends on the number and type of cables being routed. Overcrowding the tray can cause cables to overheat, leading to damage or failure. Adequate space is needed for heat dissipation and to prevent friction. Ventilated cable tray improve airflow, helping maintain safe temperatures and preventing heat buildup. Proper tray size also helps reduce electromagnetic interference (EMI) and ensures cables are properly spaced for optimal performance and safety.
Planning for Future Expansion
When selecting a tray, it’s essential to plan for future cable installations. Even if only a few cables are needed now, choose a tray that allows for future expansion. This avoids replacing or modifying the tray later, saving time and money. For large projects, leaving room for upgrades or system changes ensures flexibility without major adjustments, which helps prevent costly disruptions as the system grows and evolves.
Compliance with Industry Standards
Selecting the correct tray size is critical for compliance with NEC guidelines, which specify maximum fill percentages to prevent overcrowding. Overfilled trays risk overheating, reduced airflow, and system failure. Adhering to these standards ensures cable tray safety, prevents fire hazards, and maintains system reliability. Proper cable spacing ensures the tray operates efficiently, providing adequate ventilation and reducing risks associated with poor installation practices that could lead to electrical malfunctions.
Efficiency and Cost-Effectiveness
While sufficient space is necessary for current and future cables, trays shouldn’t be oversized. Oversized trays take up more rooftop space and increase material costs unnecessarily. Select a tray size that meets current needs while leaving room for future additions. This balance ensures a cost-effective installation that avoids wasted resources. A properly sized tray maximizes material use and ensures the installation is both efficient and economical, preventing unnecessary expenses.
Types of Rooftop Cable Tray Sizes
Rooftop cable trays come in a range of sizes and configurations, including:
- Width: Common widths include 6″, 12″, 18″, and 24″. The width of the tray is directly related to the number of cables it will hold. Selecting the right width prevents overcrowding and ensures sufficient space for cable expansion.
- Height: The height of the tray impacts its load capacity and determines how many levels of cables can be routed within it. Typically, trays with greater heights are used for heavier cables or to route multiple layers of cables.
- Length: Cable trays come in various lengths, and the length required will depend on the layout of your rooftop. The tray length must be suitable for the entire routing path of the cables, allowing for proper support and alignment.
- Custom Sizes: For specialized installations, custom-sized trays may be necessary. These are often used for unusual cable configurations or where standard trays don’t fit the physical or operational requirements of the space.
Streamlining Installation with the Right Cable Tray Size
Choosing the correct rooftop cable tray size also helps streamline the installation process. When you select a tray that’s appropriately sized for the job, the installation process becomes faster and more efficient. Less time will be spent adjusting or modifying trays during installation, and the risk of mistakes is reduced. Moreover, installing the right-sized tray from the start reduces the need for future alterations, helping you avoid costly rework or the need for additional materials.
Types of Cable Tray Insulation You Should Know
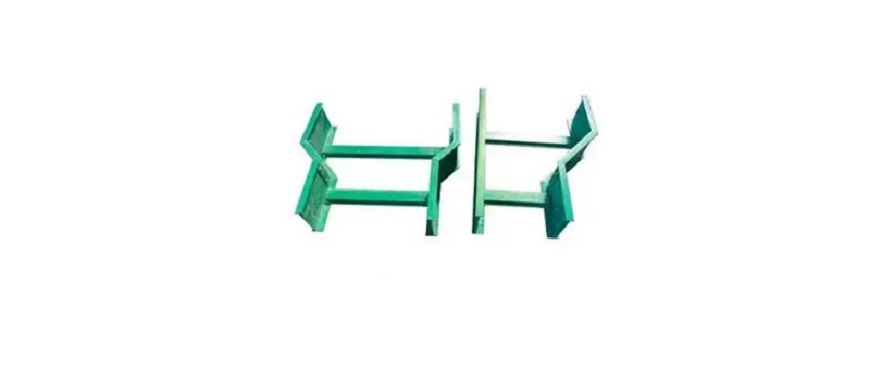
Different Support Options for Rooftop Cable Tray
Proper rooftop cable tray support is crucial for maintaining the stability and longevity of the cable tray system. When cables are installed on the roof, inadequate support can lead to sagging or movement of the trays, which may damage both the cables and the roof structure. Choosing the correct support system, including appropriate Kits, is essential to ensuring that the installation remains secure and functional over time. Understanding the different support options is key for creating a safe and reliable cable management system.
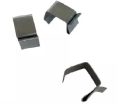
Fixed Supports
Fixed supports provide a permanent and stable method for securing cable trays in place. These supports hold the trays at set intervals, ensuring that the trays are properly aligned and that there is minimal movement once installed. Fixed supports are ideal for applications where no height adjustments or flexibility are needed. They offer the advantage of simplicity and reliability, but they must be carefully spaced to ensure that the trays remain level and do not sag over time, which could lead to damage or operational issues.
Adjustable Supports
Adjustable supports offer flexibility in positioning the cable trays at different heights or angles. This makes them ideal for installations where conditions might change, such as uneven roof surfaces or when trays need to be adjusted for future expansion or changes in cable configurations. Adjustable supports are useful when precise alignment is required, but they should be designed for stability to prevent unwanted movement that could cause sagging or shifting under weight. These supports are versatile and can be used in a variety of rooftop installations, providing greater adaptability to evolving system needs.
Suspension Systems
Suspension systems are typically used in larger installations or when cables need to be elevated off the roof surface to promote proper airflow and prevent direct contact with the roof. Elevating the trays in this way ensures that the cables remain protected from heat and moisture that could accumulate on the roof surface. Suspension supports are often used when cable trays need to be raised several inches off the roof to allow for better air circulation, reduce moisture accumulation, and prevent potential damage to both the cables and the roof membrane. These systems are essential in maintaining the integrity of large cable tray networks, especially in areas where ventilation is critical.
Roof Pad Supports
In addition to the fixed, adjustable, and suspension support methods, Kits with roof pad supports are widely used to secure trays while minimizing direct contact with the roof membrane. These pads help distribute the weight of the trays evenly across the roof surface, reducing the risk of concentrated pressure points that could cause damage to the roofing material. Roof pads act as a protective barrier between the tray and the membrane, preserving the integrity of the roof while preventing punctures, tears, or degradation. Furthermore, these pads contribute to the overall stability of the system by ensuring that the trays remain securely in place, regardless of weather conditions or external forces.
Importance of Proper Installation
Regardless of the support type chosen, the installation of rooftop cable trays should be done with care and precision. Properly spaced supports are essential to avoid sagging, ensure adequate ventilation, and prevent excessive stress on the roof and cables. In addition, each support type should be chosen based on the specific needs of the installation, such as the weight of the trays and cables, roof conditions, and future scalability. Regular inspections are also important to ensure that the trays remain secure, functional, and free of damage caused by environmental factors like wind, snow, or rain.
Benefits of Using Cable Tray Edging in Installations
Rooftop Cable Tray and Roof Pads for Mechanical Equipment
Roof pads are essential components for protecting both mechanical equipment and rooftop infrastructure, including rooftop cable trays. These pads are specifically designed to distribute weight evenly and protect the roof membrane, ensuring that equipment, such as cable trays, does not cause damage to the roofing materials. Proper installation and integration of roof pads can significantly improve the longevity and safety of the entire system.
The Role of Roof Pads in Weight Distribution and Roof Protection
When installing rooftop cable trays, careful attention must be given to how the weight of the trays, along with the cables they carry, is distributed across the roof. Overlooking this can lead to damage to the roof structure and compromise the durability of the roofing materials. Roof pads play an essential role in ensuring the proper distribution of weight and protecting the roof surface from damage.
Distributing Weight Evenly
Rooftop cable trays, especially on flat roofs, exert significant pressure on the surface. Without proper weight distribution, this can cause localized damage like punctures or structural failure. Roof pads help spread the load over a larger area, reducing stress points. It’s crucial to choose cable trays that meet weight-bearing capacity requirements to prevent damage and ensure the roof’s structural stability.
Protecting the Roof Membrane
Roof pads serve as a barrier between the cable trays and the roof membrane. Materials like EPDM or TPO are vulnerable to puncturing and wear. By preventing direct contact, roof pads help protect the membrane, preserving its integrity and ensuring it continues to provide effective waterproofing. This protection reduces the risk of roof damage, leaks, and costly repairs.
Minimizing Moisture Buildup
Roof pads help elevate cable trays, allowing air to circulate underneath and preventing moisture buildup. Trapped moisture can lead to mold, mildew, and rust, accelerating the deterioration of both the roof and the cables. By promoting airflow, roof pads reduce moisture accumulation, protecting the roof from leaks and minimizing long-term damage. This improves the durability of the installation and keeps the system dry.
Additional Considerations for Roof Pad Installation
Roof pads provide stability, preventing tray movement and vibrations caused by wind or external forces. They should be made from durable, weather-resistant materials to withstand harsh conditions. Choosing the right material ensures that the roof pads will continue to protect the roof and trays for many years. Proper installation helps avoid roof damage and ensures safe, efficient cable tray systems that endure over time.
Vibration Dampening and Equipment Protection
In addition to their role in weight distribution, roof pads also serve as a vibration dampening solution. Mechanical equipment mounted on rooftops, including HVAC units, generators, and cable trays, can generate vibrations that may have several negative effects:
- Reducing equipment wear: Vibrations can lead to wear and tear on both the equipment and the rooftop tray system. Over time, repeated vibration can cause loose connections, fatigue on mounting hardware, or even damage to sensitive cables inside the tray. Roof pads, especially those made from materials with high damping properties (like rubber or foam), can absorb some of these vibrations, reducing their impact on both the equipment and the tray.
- Stabilizing the cable tray system: Cable trays subjected to vibrations can shift or misalign, potentially leading to cable damage, electrical faults, or increased maintenance needs. Roof pads help stabilize the entire cable tray system, ensuring that it stays in place and does not shift or flex under movement.
Compliance with Safety Standards
To ensure the safety and structural integrity of the rooftop installation, it’s important that roof pads are used in compliance with safety standards and building codes. This includes:
- Load-bearing capacity: The selected roof pads must be able to withstand the combined weight of the cable trays, cables, and any other mounted equipment. Pads should be rated for the specific load requirements of the installation and must not compress or degrade over time.
- Durability: Roof pads should be made from durable materials that are resistant to weather, UV exposure, and physical wear. Common materials for rooftop pads include rubber, neoprene, and EPDM, which offer excellent resistance to harsh environmental conditions.
- Non-invasive installation: Roof pads must be designed in such a way that they do not penetrate the roof membrane or cause other damage during installation. Non-invasive installation ensures that the roofing warranty remains intact and the integrity of the roof is preserved.
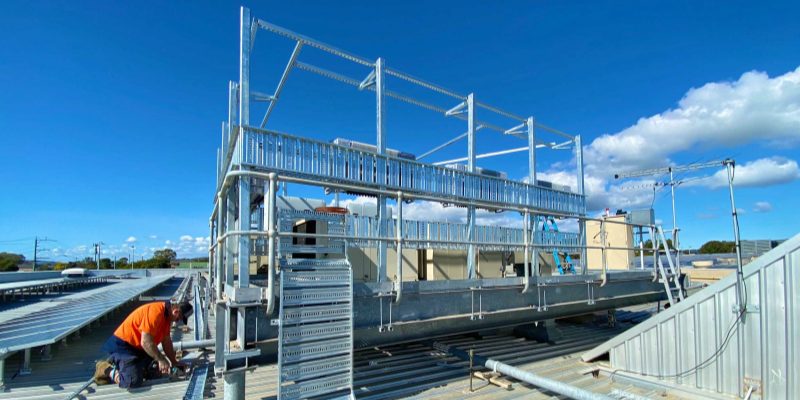
Essential Steps for Cable Tray Installation on Roof
Best Practices for Installing Rooftop Cable Trays
When installing rooftop cable trays, it is crucial to follow best practices to ensure that the system operates efficiently, remains durable, and meets safety standards. The installation process involves several critical steps, including planning, selecting appropriate materials, proper installation techniques, and compliance with national standards. Below is a detailed, step-by-step guide on the essential best practices for a successful rooftop cable tray installation.
Planning and Design
Planning involves carefully mapping the cable tray’s route on the roof, ensuring it doesn’t interfere with other equipment. Proper sizing is crucial, adhering to the NEC cable tray fill requirements. It’s essential to leave space for expansion, allowing for future cable additions without major redesigns. Proper planning ensures both current and future needs are met while optimizing cable management and safety.
Selection of Support Systems
Choose support systems based on cable weight, environmental conditions, and safety regulations. Supports should be strong enough to handle the load and placed within recommended distances to avoid sagging. Consider using corrosion-resistant materials in challenging environments. The selected supports must provide stable, secure support over time, ensuring the system remains functional and safe in all weather conditions.
Proper Installation Techniques
Use high-quality materials, such as corrosion-resistant metals, and secure trays with proper anchoring to avoid movement. Maintain adequate support spacing to prevent sagging and ensure the system’s longevity. Install trays with sufficient clearance from obstacles for easy maintenance and airflow. Following manufacturer guidelines for support spacing and securing trays guarantees that the installation is both functional and durable.
Compliance with NEC Standards
Complying with the NEC ensures proper cable fill and safety. The trays should not exceed the fill capacity, leaving enough room for ventilation. Correct sizing based on cable type and diameter is crucial. Adhering to grounding, bonding, and routing requirements will reduce electrical hazards. Regularly checking for compliance with NEC standards ensures a safe and reliable installation that meets both regulatory and functional needs.
Regular Inspections and Maintenance
Routine inspections help identify issues like corrosion or damage to the trays and cables. Keeping trays clear of debris ensures proper airflow and reduces overheating risks. Check cables for wear and replace any damaged ones to avoid system failure. Regular maintenance helps extend the system’s lifespan and ensures safe and efficient operation over time.
FAQs about Rooftop Cable Tray
When comparing cable trays to conduits, cable trays are often considered a more cost-effective solution for several reasons. First, cable trays generally require less labor to install than conduit systems. Conduit systems, especially rigid or IMC (Intermediate Metal Conduit), demand more time and effort to install because cables must be individually pulled through the tubes, often requiring more fittings and tighter installations.
In contrast, cable trays offer an open structure, allowing for easier placement and future modification of cables without the need for pulling through a conduit. This significantly reduces installation and maintenance costs. Additionally, cable trays are more adaptable for future expansions, which can save on long-term costs as new cables can be added without significant upgrades or replacements. However, while cable trays may initially seem cheaper, the choice depends on the specific application, environmental factors (e.g., exposure to chemicals or weather), and space requirements.
The three main types of cable trays are ladder trays, solid-bottom trays, and ventilated trough trays. Each type is designed for specific purposes, based on the type of cables being used and the environment where the tray is installed.
Ladder Trays: These trays have a structure similar to a ladder, with rungs and side rails. They are the most commonly used and are excellent for supporting heavy or large cables while allowing for maximum airflow. The open design allows for efficient heat dissipation, making it ideal for applications where heat buildup is a concern.
Solid-Bottom Trays: As the name suggests, these trays have a solid base and are typically used in environments where extra protection is needed for cables, such as preventing debris from accumulating or shielding against electromagnetic interference (EMI). They are less ventilated, which means less airflow for cooling, but they provide additional physical protection for the cables.
Ventilated Trough Trays: These trays have a solid or perforated bottom but with ventilation slots. This allows for better airflow than solid-bottom trays while still providing some protection for cables. They are a good choice for applications where both protection and ventilation are needed but without the full exposure of a ladder tray.
Ceiling cable trays come in various sizes to accommodate different cable types and installations. Common sizes for ceiling trays typically range in width from 6 inches to 36 inches, depending on the number and size of cables to be routed. Standard heights for ceiling cable trays can vary from 2 to 6 inches, but custom sizes are also available. The specific size selection depends on several factors, including the weight of the cables, the type of cables being installed, and the available space in the ceiling for installation.
For proper cable tray fill, which is regulated by the NEC (National Electrical Code), it’s important to select a tray that provides enough space for the cables to avoid overcrowding, which could lead to overheating or damage. A larger tray size is typically used for more cables or larger cable bundles, while smaller trays are suitable for lighter loads. Ceiling trays can be mounted directly on the ceiling, using support brackets or hangers, and are often used in commercial or industrial settings where cables need to be routed through the ceiling space to maintain an organized, efficient wiring system.
The key difference between a cable ladder and a cable tray lies in their design and use cases. Both are used for cable management, but they differ in structure and functionality.
Cable Ladder: A cable ladder has a design resembling a ladder, with side rails connected by horizontal rungs. This open structure allows for easy access to the cables, which is beneficial for larger, heavier cables that require good support and maximum airflow. The cable ladder is commonly used in industrial settings, where robust support for heavy cables is needed and where temperature control and airflow are critical. It is often used for long spans and has fewer limitations in terms of heat dissipation.
Cable Tray: A cable tray, on the other hand, can come in several different forms, including solid-bottom trays, ventilated trays, or wire mesh trays. The solid bottom provides more protection to the cables, while the wire mesh type offers a more flexible and lightweight design. Cable trays are often used in commercial buildings and are better for applications where cables need to be protected from physical damage, dust, or moisture. The tray system is more versatile compared to the ladder, as it can be adapted to different configurations based on the space and the type of cables.

As the editor of GangLong Fiberglass, I have years of experience and in-depth research, focusing on cable tray products, fiberglass solutions, and grille systems. I incorporate years of industry insights and practical experience into every content, committed to promoting the progress of the industry. At GangLong Fiberglass, my commitment is reflected in every product, from innovative cable trays to durable fiberglass solutions and sturdy grille systems. As an authoritative voice in the industry, my goal is to provide valuable information to professionals and businesses and promote forward-looking solutions.