Maintaining a clutter-free and organized workspace is essential for boosting productivity and creating a positive work environment. Cables left unchecked can cause tripping hazards, wear and tear, and interfere with equipment performance. A DIY cable management tray installed under your desk offers an effective solution to these problems. Organize and hide under-desk cords with a diy cable management tray using Velcro straps, rubber bone clips, toilet-paper roll holders. This under-desk system keeps cords neatly organized and hidden with easy access. By improving safety, reducing distractions, and enhancing aesthetics, a DIY tray helps you stay focused and truly efficient every day.
What is a DIY Cable Management Tray?
A DIY cable management tray is a simple yet highly effective organizational tool that helps streamline your workspace by keeping cables neatly tucked away under your desk or workspace. Typically designed as a shallow tray or basket, it can be attached to the underside of your desk, offering a designated space to store and conceal cables, power cords, USB wires, and chargers. This handy solution is particularly beneficial for those who juggle multiple devices, helping to eliminate the chaos of tangled cords that can clutter the workspace.
Function of a DIY Cable Management Tray
The primary function of a homemade cable tray is to create an organized space for all your cables, keeping them hidden from view and preventing the risk of tangling. It provides a designated location where cables can be safely stored, which means no more messy, visible wires running across your desk. This simple yet highly effective organizational solution ensures that cords remain neatly contained, easy to find when needed, and free from damage. It also prevents cables from obstructing your workspace, allowing you to maintain a clean, efficient, and clutter-free desk.
Benefits of Using a DIY Cable Management Tray
Cleaner Workspace
A DIY cable management tray instantly transforms your desk area by concealing power cords, USB cables, and charging leads beneath or behind your workspace. This hidden storage solution prevents unsightly cable clusters and dangling wires, giving your setup a sleek, professional look. With cables neatly tucked away, dusting and cleaning also become faster and more effective, helping maintain a hygienic and inviting work environment.
Enhanced Safety
Exposed cables pose trip hazards and can lead to accidental unplugging or damage when feet or chair wheels catch on them. Installing a DIY cable tray keeps all cords securely out of foot traffic zones, reducing the risk of falls and electrical shorts. Properly supported cables also experience less bending stress and abrasion, which minimizes wear and tear and lowers the chance of exposed conductors or fire risks.
Improved Productivity
A clutter-free environment fosters better concentration and reduces the mental friction caused by disorganized workspaces. By using a DIY tray to group and align cables, you eliminate the visual noise of tangled wires, allowing you to focus fully on your tasks. Quick troubleshooting—like identifying which cable belongs to which device—also becomes effortless, saving you time and frustration during intense work sessions.
Easy Access
Despite being hidden, cables in a DIY tray remain easily reachable. Most designs feature an open-top or slotted sidewalls, so swapping out old cables or adding new ones takes mere seconds. This flexibility is especially valuable in tech-heavy setups where devices are frequently changed or upgraded. You won’t need to dismantle complicated fixtures—simply slide the cable in or out of the tray as needed.
Cost-Effective and Customizable
Creating your own cable management tray requires only basic materials—scrap wood, PVC piping, or perforated metal strips—available at any hardware store. You choose the dimensions, color, and finish to perfectly match your desk or décor. Whether you prefer a minimalist under-desk rack or a bold, painted statement piece, a DIY approach lets you tailor the design to your budget and style, all while honing your maker skills.
Top Affordable Solutions for Cheap Cable Tray Systems
Materials You’ll Need for Your DIY Cable Management Tray
Before diving into your DIY cable management tray project, it’s essential to gather all the necessary materials to ensure a smooth and efficient build. Below is a comprehensive list of materials that will help you create a sturdy, functional tray to organize your cables. In addition, some optional items are included to make the process easier and enhance the functionality of your design.
Materials for a DIY Cable Management Tray
Wood (for woodworking projects)
When selecting wood for your DIY cable management tray, choose lightweight yet durable materials such as plywood, MDF, or pine. Plywood offers excellent strength and resistance to warping, making it versatile for various tray sizes. MDF provides a smooth, paint‑ready surface ideal for a polished finish. Pine is budget‑friendly and easy to cut, perfect for beginners who want a straightforward build.
Screws, Brackets, and Nails
To secure your tray firmly beneath your desk, gather an assortment of wood screws, metal brackets, and nails. Screws deliver the most reliable hold, especially when paired with angle brackets at each corner. Brackets add reinforcement for heavier loads—like power strips—while nails can speed up assembly if you’re fastening lighter cables or a small cable tray.
Measuring Tape, Saw, and Wood Glue (for woodworking)
Precision is essential for a snug‑fitting tray. A measuring tape ensures accurate dimensions before cutting, while a jigsaw or circular saw makes clean, straight cuts through your wood panels. Wood glue acts as an adhesive backup—apply it to all joints before screwing or nailing to reinforce connections and minimize wobble over time.
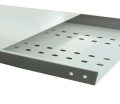
Pre-made Cable Trays or Baskets (optional)
Organizing cables within your tray requires a few essential accessories. Cable clips keep wires aligned along edges, preventing tangling. Zip ties bundle cables securely for permanent installation, while Velcro strips allow easy adjustments and reuse. Combined, these accessories streamline cable management, making maintenance and modifications simple and efficient for installation setups.
Cable Clips, Zip Ties, and Velcro Strips
Organizing cables within your tray requires a few key accessories. Cable clips (adhesive or screw‑mounted) keep individual wires aligned along tray edges. Zip ties bundle cables permanently, while Velcro strips let you adjust and reuse tie points.
Sourcing Materials
You can find most of these materials at local hardware stores, online retailers, or even repurpose materials from old furniture you no longer use. For instance, old wooden furniture can be repurposed into a custom cable management tray with just a few basic tools. If you don’t have access to woodworking tools, you can find pre-cut wood pieces at craft stores, or choose to buy ready-made trays to fit your needs.
By gathering the right materials for your DIY cable management tray, you’ll be prepared to build a sleek, functional, and durable cable management system that not only keeps your workspace neat but also ensures long-lasting performance. Whether you decide to build from scratch or use pre-made elements, this project can be completed with ease and will significantly improve your workspace organization.
DIY Cable Management Tray Woodworking Projects
If you’re comfortable with woodworking, creating a cable tray fabrication formula from scratch can be a rewarding and personalized project. Here’s a step-by-step guide to building a basic wooden cable management tray:
Step-by-Step Guide to Building Your Own DIY Cable Management Tray
- Measure Desk Dimensions: Begin by measuring the available space under your desk. This will help you determine the size of the tray. Allow some extra room for future cables or power strips.
- Cut the Wood: Using a saw, cut the wood into the appropriate dimensions for your tray. For a standard desk, a rectangular tray with a width of 6-8 inches and a length that spans the width of your desk should suffice.
- Assemble the Tray: Apply wood glue to the edges of the cut wood pieces and attach them using screws or nails to form the base of the tray. You may want to add side walls to contain the cables.
- Sanding and Finishing: Sand the edges and surfaces of the tray to remove any rough spots. Then, stain or paint the wood to match your desk or the overall aesthetic of your workspace.
- Attach the Tray: Once the paint or stain is dry, attach the tray to the underside of your desk using screws or brackets. Make sure the tray is positioned at a convenient height and location, so it’s easy to access cables when needed.
- Organize the Cables: Use cable clips, zip ties, or Velcro strips to bundle and organize your cords within the tray. This ensures that cables are neatly stored and easy to manage.
Customization Tips for Your DIY Cable Management Tray
- Add Compartments: If you have multiple types of cables, such as power cords and USB cables, consider adding dividers or compartments inside the tray to keep them separated and easy to find.
- Adjust for Desk Size: Customize the length and depth of the tray to fit the specific size of your desk and the number of cables you need to organize.
- Stain or Paint for Aesthetic: Personalize your tray with your preferred wood stain or paint color to ensure it matches your workspace decor.
A Step-by-Step Guide to Cable Race Tray Installation
DIY Cable Management Tray with Drawers
For those who prefer an added level of organization, a DIY cable management tray with drawers provides an excellent solution. This approach allows you to not only store cables neatly but also to hide power strips and adapters, keeping your desStep-by-Step Guide for Adding Drawers to Your DIY Cable Management Tray:
Adding drawers to your DIY cable management tray takes the functionality of your workspace organization to the next level. Not only does it offer a place to store cables, but it also provides hidden storage for smaller accessories like chargers, adapters, and power strips. Here’s a detailed step-by-step guide to help you integrate drawers into your cable tray project:
Drawer Maker Guide
Measure and Cut Wood
Start by carefully measuring the space under your desk to ensure that your cable management tray and drawers fit comfortably. You’ll want to make sure the tray is wide enough to house all your cables, while the drawers should be deep enough to store extra accessories without taking up too much space. Once you have your measurements, cut the wood for both the tray and the individual drawer compartments. Use a saw or jigsaw to ensure precise cuts.
Assemble the Tray and Drawers
Construct the tray as described in earlier steps, securing the pieces with screws and wood glue. After completing the tray, build the drawer boxes separately. For each drawer, you will need four sides, a bottom panel, and the drawer slides. Attach the drawer slides to the sides of the drawer boxes, making sure they are aligned correctly so the drawers will open and close smoothly. If you’re using wood, wood glue is useful for holding the pieces in place before securing them with screws or nails.
Install the Drawers
Once the drawers are assembled, it’s time to attach them to the DIY cable management tray. Ensure the drawers fit snugly beneath the desk and are easy to open and close. Install the drawer slides onto the underside of the tray, ensuring there’s enough clearance for the drawers to move smoothly without obstructing the cables stored inside. Double-check that the drawers are level and aligned properly before securing them permanently.
Final Touches
After the drawers are in place, add dividers inside each drawer to better organize cables, chargers, and other accessories. Dividers can be made from small pieces of wood or plastic and will help separate different types of cables, preventing tangling. You can also label each compartment for quick identification, making it easier to locate specific cables or devices when needed. This is especially helpful if you’re managing multiple devices, ensuring you can quickly access the cables you need without searching through a pile of cords.
Benefits of a DIY Cable Management Tray with Drawers
Hidden Storage
The addition of drawers allows you to hide cables and electronic accessories, eliminating visual clutter. With everything neatly stored away, your workspace will appear more organized and professional. Drawers keep your cables out of sight, which is particularly useful if you have guests or clients frequently visiting your home office or workspace.
Increased Functionality
The drawers don’t just store cables; they can house power strips, adapters, extra cords, or even small office supplies like pens or sticky notes. With this added functionality, you create a multi-purpose storage system that keeps everything in one place and easily accessible when needed. Instead of cluttering your desk with extra cords or devices, you now have a dedicated space for them.
Improved Workspace Efficiency
The organization and easy access to your cables and accessories contribute to a more efficient workspace. With cables neatly stored and readily accessible in the tray, you’ll reduce the time spent untangling wires or searching for lost cables. This can increase your productivity and help maintain focus, as the distraction of a messy desk is eliminated.
Customizable and Flexible
A DIY cable management tray with drawers is a customizable project that can be adapted to meet your specific needs. You can modify the size of the drawers, add additional compartments, or even use different materials for the drawers to match your workspace decor. This makes it an ideal project for creating a storage solution that is both functional and personalized.
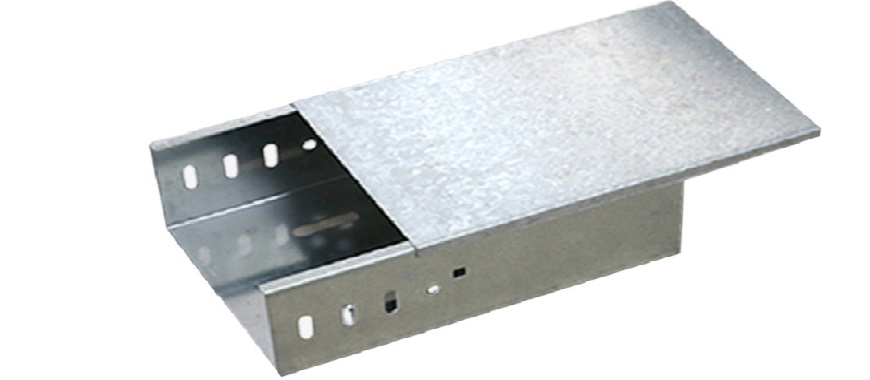
DIY Cable Management Tray Box: An Alternative to Trays
Step-by-Step Guide for Creating a DIY Cable Management Box
While a DIY cable management tray is an excellent option for organizing cables under your desk, a cable management box can be a great alternative or complement to further reduce clutter. This approach is especially useful for hiding large power strips, adapters, and long cables that can otherwise create visual distractions. Follow these simple steps to create your own cable management box:
- Select a Box: Choose a box or container that can comfortably store power strips and cables. You can use wood, plastic, or metal, depending on your aesthetic preference and the durability you need. Make sure it’s large enough to fit your cords and power strips but not too bulky for your desk space.
- Drill Holes for Cables: Drill holes in the box for cables to pass through. These holes should be large enough to fit plugs and cables but not so large that they compromise the box’s appearance. Use a drill bit suited to the material of your box (metal, wood, or plastic). Smooth out the edges of the holes to avoid damaging cables.
- Organize the Cables: Place the power strips and cables inside the box. Use clips, zip ties, or Velcro strips to keep everything neat and prevent tangling. Ensure that the power cord leading to the power outlet runs through one of the drilled holes. Secure all cables so they are tidy and easy to access when needed.
- Position the Box: Place the box under your desk or attach it to the wall near a power outlet. If placing it under the desk, make sure it is easily accessible but out of sight. Alternatively, you can mount it on the wall to save space and keep cables organized without cluttering your workspace.
Benefits of Using a Cable Management Box
Conceals Power Strips and Adapters
A cable management box hides bulky power strips and adapters inside a sleek enclosure, instantly improving workspace aesthetics and reducing visual clutter. By enclosing these components, the desk appears cleaner, more professional, and organized. The hidden power supply remains easily accessible yet unobtrusive. Transparent or ventilated designs maintain functionality while preserving airflow and preventing overheating of adapters and ensuring durability.
Simplifies Cable Access
A cable management box provides convenient access to power strips and connectors without requiring removal or rearrangement of cables. The enclosure features user‑friendly entry points or lids that allow you to plug in or unplug devices effortlessly. Organized interior cable routing prevents obstructions, enabling you to maintain clean connections. With everything contained yet reachable, daily device changes become more efficient.
Reduces Cable Tangling
By containing cables within an enclosed box, you avoid the nuisance of tangled cords cluttering your workspace and desk floor surfaces. Inside, cables can be bundled with hooks, clips, or hook‑and‑loop straps to maintain separation. This arrangement prevents knots from forming, simplifies identification of individual lines, and reduces stress on connectors. Fewer tangles mean less time spent untangling, boosting productivity.
Enhanced Safety
A cable management box encloses power cables and adapters, reducing their exposure to accidental contact and tripping hazards, thereby improving workspace safety. It prevents loose wires from catching on feet or equipment, minimizing potential falls. Organized cables are less likely to fray or be pinched, decreasing the risk of electrical shorts or fires. The enclosure also shields cables from pets.
Customizable Design
A DIY cable management box can be tailored to your requirements, supporting any combination of power strips, adapters, and cable types. You can add interior dividers, ventilation holes, and select materials or colors to match décor. Modular attachments and removable panels enable easy expansion or reconfiguration as your equipment changes, providing a personalized, adaptable unique solution for evolving workspace setups.
Professional Cable Tray Cutter for Large-Scale Projects
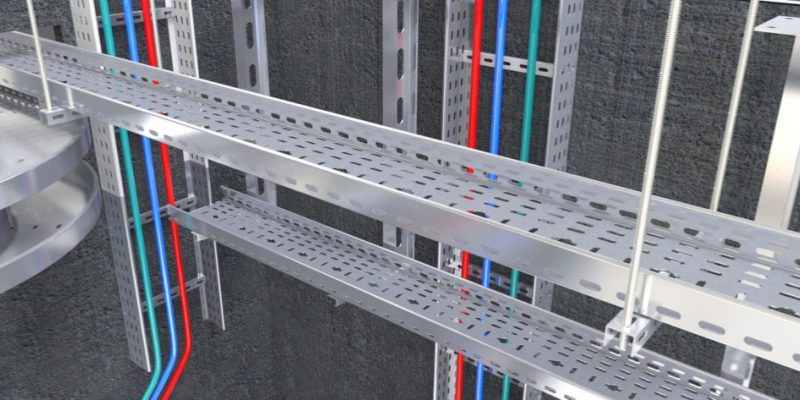
Under Desk DIY Cable Management Tray Solutions
Effective under desk cable management is key to maintaining a clean and organized workspace. With the rise of home offices and tech-heavy work environments, the need to manage cables and cords has become more important than ever. A clutter of cables not only looks unprofessional but can also cause safety issues, like tripping hazards. Thankfully, there are several DIY cable management tray options that can help you organize and hide cables efficiently under your desk.
Different Under Desk Cable Management Options
- Trays: DIY cable management tray is the most common option for organizing cables beneath your desk. It’s easy to install, affordable, and can hold multiple cables without them getting tangled. You can build a tray yourself using wood or repurpose a plastic or metal tray from a hardware store.
- Hooks: Installing hooks under your desk can be a simple solution for hanging cables or power strips. This helps keep cables off the floor and out of sight, while also reducing the risk of tangling. Hooks are especially useful for cables that are frequently moved or adjusted.
- Baskets: DIY cable management baskets are another great solution for organizing cables. These can be mounted under the desk or along the back wall. Baskets provide a more flexible storage option compared to trays, allowing you to store more cables or larger devices like power strips.
Why Under-Desk Cable Management is Essential
- Improves Aesthetics: By hiding cables under the desk, you create a more polished and professional workspace.
- Reduces Cable Tangling: Keeping cables organized prevents them from tangling, which not only looks better but makes it easier to find the right cord when needed.
- Prevents Tripping Hazards: Loose cables on the floor pose a serious tripping risk. Under desk cable management solutions, such as a DIY cable management tray, help keep cables out of the way and reduce these safety concerns.
DIY Options for Attaching Cable Trays or Baskets
- Using Brackets or Screws: You can use simple brackets or screws to attach a DIY cable management tray or basket to the underside of your desk. This is a sturdy solution that ensures your cable management system stays in place.
- Velcro Strips or Command Hooks: If you don’t want to drill holes in your desk, you can use Velcro strips or command hooks to attach your tray or basket. These solutions are great for temporary setups or desks where drilling isn’t an option.
Considerations for Choosing the Right Location Under the Desk for Cable Management
- Accessibility: Make sure the tray or basket is placed in a location where you can easily access cables when needed.
- Proximity to Power Sources: Position the tray or basket close to power outlets or power strips to reduce the length of cables and prevent unnecessary tangling.
- Space Efficiency: Choose a location that doesn’t interfere with legroom or other desk activities, such as moving your chair or accessing drawers.
By choosing the right under desk cable management solution and a strategic location, you can create an organized, functional workspace that maximizes efficiency and minimizes distractions.
Additional Cable Management Ideas for Desks
Beyond DIY cable management tray options, there are several other creative and practical solutions to further enhance cable organization at your desk. Here are some ideas that can complement your existing cable management setup:
Cable Management Clips
Cable management clips are an excellent tool for keeping cables organized along the edges of your desk. They attach easily to the surface and hold cables securely in place, preventing them from slipping off or tangling. Use clips for power cords, charging cables, or headphone wires that need to stay in a specific position.
Cable Ties
Cable ties are a simple and effective way to bundle cables together. By grouping cables into neat bundles, you can significantly reduce clutter on your desk and keep cables from tangling. Zip ties, Velcro strips, or reusable cable ties are all excellent options, and they make it easier to keep cables organized inside your DIY cable management tray.
Cable Covers
If you have cables that run along the floor or across the desk, cable covers can help hide them and make your workspace look tidier. You can choose from fabric or plastic cord covers, which can be installed easily to conceal cables while also providing protection from wear and tear.
Binder Clips
Binder clips are a handy, low-cost way to organize smaller cable groups. You can clip cables to the edges of your desk or use them to group cables that are frequently used together. Binder clips are especially useful for managing short cords like phone chargers or USB cables.
How to Fabricate a Cable Tray
When you’re looking to take your DIY cable management tray project to the next level, understanding how to fabricate a cable tray from scratch is a valuable skill. Fabricating a cable tray is a simple yet rewarding process, allowing you to create a custom cable organizer that perfectly fits your desk and cable management needs. This section will walk you through the essential steps of fabricating a basic cable tray.
Step-by-Step Guide
Measure and Plan
Begin by measuring the available space beneath your desk to determine the required length, width, and cable tray depth, then factor in the number and diameter of the cables and devices you plan to organize for overall functionality, ensuring that you leave sufficient airflow clearance around the cables to prevent overheating and maintain optimal performance over extended periods.
Select the Material
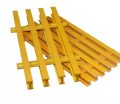
Choose a suitable material based on your desired aesthetic and budget considerations: wood such as plywood, MDF, or solid boards for a warm, natural appearance; metal components like repurposed shelving, brackets, or wire mesh for a durable, industrial finish; or plastic trays and containers for a lightweight, economical option that is easy to cut, customize, and install under your desk.
Cut the Materials
With your measurements in hand, cut each selected material precisely to size: use a saw or circular saw for wood sheets, tin snips for metal panels, and a sharp utility knife or scoring tool for plastic components; smooth every edge with sandpaper or a deburring tool to avoid sharp points that could damage insulation or injure your hands during installation.
Assemble the Tray
Align the cut pieces to form a rectangular tray, then secure wooden joints with wood glue and countersunk screws; if using metal or plastic, drill pilot holes and fasten panels with self-tapping screws or rivets. Reinforce every corner with metal brackets or corner braces, and double-check that all connections are tight so the assembled tray remains rigid under cable weight.
Finish and Sand (Optional)
For wooden trays, sand all surfaces and edges thoroughly using grit sandpaper until edges are smooth, then apply a protective stain, sealant, or paint to protect the wood; for metal or plastic trays, file or deburr every cut edge, remove any sharp points, and wipe down the entire surface with a damp cloth to remove dust and oils before mounting.
Install the Tray
Position the completed cable tray beneath your desk where it remains hidden and accessible, then mark the mounting points on the underside of the desktop; choose appropriate hardware such as L‑brackets with screws for wooden surfaces or heavy‑duty zip‑ties and adhesive clips for metal frames or laminates, and secure the tray so it hangs level and supports the cable load.
Organize Your Cables
Arrange your cables inside the tray using Velcro wraps, cable ties, grouping power cables separately from data and audio cables to minimize electromagnetic interference; leave sufficient slack at each device connection to prevent tension, label each cable with tags or colored bands for quick identification, and review and adjust the layout as you add or remove devices to maintain order.
Why Fabricating Your Own Cable Tray is Beneficial
- Customization: Fabricating your own DIY cable management tray allows you to customize it to your specific needs. Whether you need more space for power strips or prefer a smaller tray for just a few cables, you can design the tray to suit your workspace perfectly.
- Cost-Effective: Building your own cable tray can be far more affordable than buying a pre-made one. Materials like wood and plastic are inexpensive and widely available, and when you build cable trays yourself, you’ll be able to create a high-quality product for a fraction of the cost.
- Aesthetic Control: When you fabricate the tray yourself, you have full control over the aesthetic. You can paint, stain, or finish the tray to match the rest of your desk and workspace, ensuring that it complements the overall look.
FAQs about DIY Cable Management Tray
Making simple cable management can greatly improve the organization of your workspace. Start by identifying all the cables you need to manage—this could include power cords, USB cables, or HDMI cables. The next step is to group them based on type or function to keep things organized. Use cable ties or Velcro straps to bundle similar cables together, keeping them neat and easy to untangle. For a simple solution, you can install cable clips along the edges of your desk to prevent the cables from hanging loosely. Additionally, a cable tray mounted underneath your desk can help store and conceal multiple cables in one place, giving your workspace a clean, tidy look. You can also repurpose toilet paper rolls or small cable organizers to create DIY cable holders that keep cables off the floor. Finally, label each cable with a tag or sticker to avoid confusion when unplugging or re-routing cables.
Organizing cables on the wall is a great way to declutter your workspace and save desk space. To start, use adhesive cable clips or mountable cable organizers that can be affixed to the wall without damaging the paint or surface. Plan the path for your cables before installing anything, ensuring that cables are arranged neatly and securely. Cable raceways or cable covers are excellent for hiding and organizing cables along the wall. These can be found in various materials like plastic or metal and can be cut to the desired length. Start by marking where the cables should go, and then attach the cable raceway to the wall using screws or adhesive. If you want a cleaner look, you can paint the cable raceway to match your wall color. For a more aesthetic approach, you can even decorate the raceway with wallpaper or fabric. Keep in mind that leaving some slack in the cables will prevent strain, which can lead to damage over time.
Hiding cords on your desk is essential for both aesthetics and functionality. Start by identifying where each cable originates and where it needs to go. For excess lengths, use clips, sleeves, or wraps to bundle cables and reduce clutter. A DIY cable tray mounted beneath your desk effectively conceals both cables and power strips. For extra‑long runs, coil cables neatly and secure them with a Velcro tie to prevent hanging slack. Cable boxes or covers can hide power strips or unsightly cords at the back of your desk. For an even cleaner look, route cables along the desk’s rear edge and tuck them under your chair. Always leave sufficient slack to avoid tension that could cause wear and tear.
Keeping your cables organized requires a combination of strategies depending on your space and the type of cables you are dealing with. A good starting point is to group similar cables together—this could be power cords, USB cables, or HDMI cables. Use cable ties or Velcro straps to keep them bundled. For larger setups, such as a home office or entertainment center, consider investing in cable trays or cord management boxes to store multiple cables at once. These can be mounted to the underside of your desk or placed on a shelf. You can also use cable clips or adhesive mounts to secure cables along the edges of desks or walls. For portable cables, like phone chargers, a DIY cable organizer bag or pouch can help keep everything in one place, preventing cables from tangling. Another useful tip is to label cables with tags so you know exactly which cable goes where. Finally, always check for any loose cables that may be prone to tangling and address them with a cable management solution before they create a mess.

As the editor of GangLong Fiberglass, I have years of experience and in-depth research, focusing on cable tray products, fiberglass solutions, and grille systems. I incorporate years of industry insights and practical experience into every content, committed to promoting the progress of the industry. At GangLong Fiberglass, my commitment is reflected in every product, from innovative cable trays to durable fiberglass solutions and sturdy grille systems. As an authoritative voice in the industry, my goal is to provide valuable information to professionals and businesses and promote forward-looking solutions.